The Ultimate Guide to Installing a Professional-Quality Garage Floor Epoxy
Are you looking to give your garage a complete makeover and create a more durable, professional-looking surface that’s easy to maintain? If so, then epoxy flooring is an ideal solution for transforming your garage from just a storage area into the heart of your home. Installing garage floor epoxy may seem like a daunting task at first, but with some research and guidance, you can achieve fantastic results! This guide will provide you with all the information necessary to prepare and install an epoxy coating on your garage floors quickly and efficiently. Plus – when done right, this type of coating not only looks great but also provides added durability and protection against wear & tear. Read on for everything that you need to know about installing professional quality epoxy in your garage.
Decide Whether Epoxy is Right for Your Garage Floor
When it comes to designing your garage, the flooring might not be the first thing that comes to mind. However, it’s an important aspect to consider. An epoxy coating on your garage floor can offer impressive durability, stain-resistance, and even an attractive shine. But is it the right choice for you? Consider the level of traffic your garage gets, as well as any potential spills or leaks that may occur. Additionally, epoxy requires a bit of prep work before application, so make sure you’re up for the task or hire a professional.

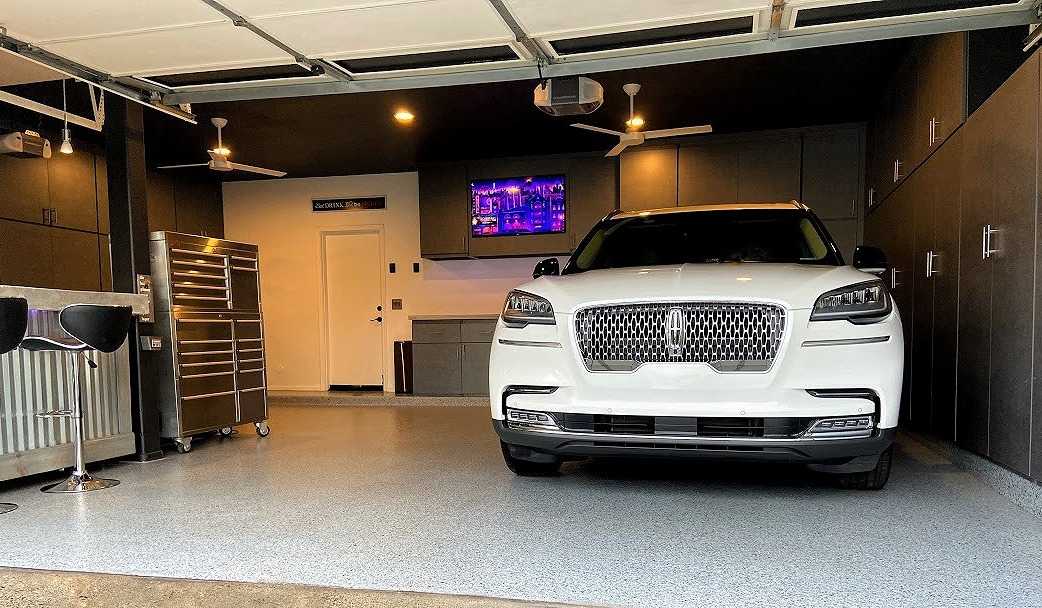
Garage Epoxy Flooring
Prepare the Surface for Epoxy Installation
Before beginning your epoxy installation project, it is crucial to prepare the surface correctly. A properly prepared surface ensures that the epoxy adheres accurately, creating a durable and long-lasting finish. First, make sure the surface is clean and free of debris, oil, and grease. Use a degreaser to remove any contaminants and then rinse the surface thoroughly with clean water. The next step is preparing before epoxy installation, to inspect the surface for any cracks or imperfections. Fill in any holes or cracks with a suitable epoxy filler and allow it to dry thoroughly. Sand the entire surface to create a roughened texture, which will aid in the epoxy’s adhesion. Finally, wipe down the surface with a tack cloth to remove any dust or debris, as this can affect the epoxy’s adhesion.
Gather Supplies Needed for Installing Epoxy
Are you ready to transform your flooring into a sleek, modern masterpiece with the help of epoxy? Before you start, it’s essential to gather all the necessary supplies for the job. You’ll need to stock up on epoxy resin, hardener, and a variety of tools such as a roller, squeegee, and paint brushes. Don’t forget to pick up some safety equipment, including gloves and goggles, as the fumes from epoxy can be quite strong. Once you’ve gathered all your supplies, you’ll be ready to tackle the installation and create a stunning new look for your space.
Apply a Base Coat of Epoxy to the Garage Floor
When it comes to giving your garage floor a much-needed makeover, applying a base coat of epoxy is a great first step. Not only does epoxy create a durable, long-lasting surface that can withstand heavy traffic and spills, but it also adds a sleek, professional look to your garage. Plus, with a little preparation and patience, you can easily tackle this DIY project on your own. By properly cleaning and sanding your garage floor before applying the epoxy, you’ll ensure that it adheres well and creates an even finish.
Epoxy Garage Floor
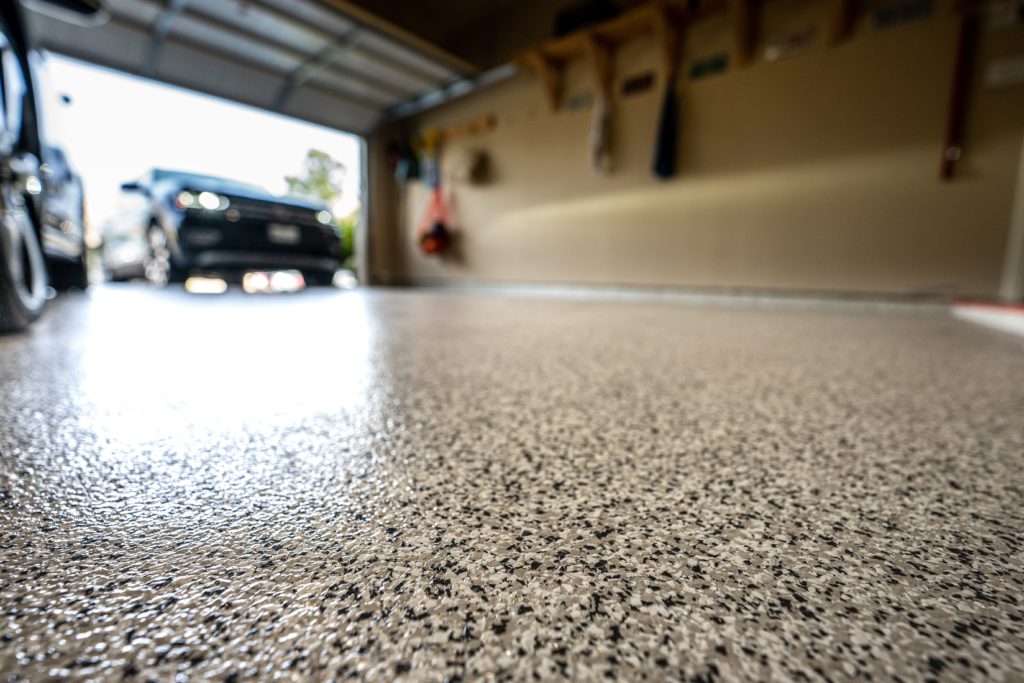
Add Color and Customize with Chips, Flakes or Sand
Looking to add a little pizzazz to your concrete or epoxy flooring? Look no further than chips, flakes, or sand. Not only do these additions add much-needed color to an otherwise plain surface, but they also offer an opportunity to customize your flooring to your liking. Chips can be used to create a speckled, terrazzo-like finish, while flakes provide a more seamless, monochromatic look. And sand can add texture and grip for a safe, slip-resistant surface. With a variety of epoxy colors and sizes to choose from, the possibilities are endless.
Seal the Epoxy with a Top Coat
Epoxy flooring is a beautiful and durable option for any space, but it requires proper maintenance to keep it looking its best. One important step in maintaining your epoxy flooring is to seal it with a top coat. This enhances its aesthetic appeal and increases its durability. The top coat not only protects the epoxy from everyday wear and tear but also seals in any flakes or chips, ensuring that your flooring remains smooth and chip-free.
Installing an epoxy coating on your garage floor is easily manageable for most homeowners. Before beginning, it’s essential to thoroughly clean and prep the surface of the garage floor for best results. Additionally, you should consider all the supplies required to complete the job successfully. Once a base coat of epoxy has been applied, you can customize the color or texture with chips or flake colors. Finally, don’t forget to apply a clear top coat sealer for further protection against wear and tear in your garage. With just a little bit of effort and time, you can make sure that your garage space looks great and also lasts for many years to come.